
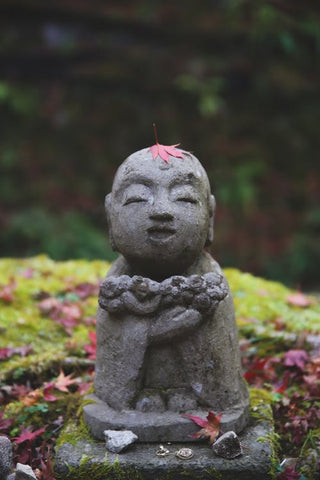
How to Refurbish Stone Garden Decor
Aug 17,2022 | yoflos.com
How to Clean Stone Garden Ornaments
Cleaning any stone garden ornaments is a simple process but will require some manual labor on your end. Thankfully, this cleaning tactic works well for stone and marble, wood, concrete, and even bronze.
Here are the materials needed for cleaning stone garden ornaments:
- Soft bristle brush
- Mild soap or detergent
- Drying towel or rag
First, you will need to create a cleaning solution using mild soap or dish detergent and warm water. Grab any brush you would use to clean your nails or vegetables in your kitchen sink to scrub your garden ornament.
You'll want to make sure to clean your statue on a nice sunny day to avoid any moisture seeping in and causing cracks later on.
Using a garden hose, lightly rinse your statue. Don't use any excessive pressured water as this can cause damage to your statue. Then, gently scrub away any built-up dirt and grime using your brush and cleaning solution.
Once you've finished scrubbing your statue, you can rinse it clean once again with the house and wipe your statue dry.
How to Restore Garden Statues
Whether you have purchased your garden statue from a local flea market or second-hand shop or are looking to restore any weathered damages, we're here to help. It's essential to restore and repair your garden statues before any harsh weather of the winter months, making any existing damages that much worse.
To get started on your garden statue restoration project, follow these simple steps.
1. Gather Materials
Here is a complete list of the materials you will need to restore your garden statue:
- Bristle brush
- Mild soap or detergent
- Epoxy putty
- Epoxy adhesive
- Knife or narrow spatula
- Crafting knife
- Cloth
- Plastic gloves
- Multi-purpose acrylic paint
- Acrylic sealer spray
2. Clean the Surface
Begin by gently removing any loose dirt, debris, moss, etc., from your garden statue using your hands. Next, make a cleaning solution by diluting a mild soap or dish detergent with warm water. Using the cleaning solution and a bristle brush, you will want to scrub the surface to remove any deeper dirt or grease.
Once you've thoroughly cleaned your statue, you can rinse it clean with water. Allow the statue to dry completely before moving on to the next steps. Following these steps closely will ensure your adhesive bonds properly to the stone as needed later on.
3. Prepare the Epoxy Putty
Next, using the epoxy putty, also known as Milliput, you can begin filling in any gaps throughout the surface of your statue. Milliput is easy to find and comes in five colors, with Silver Grey being the best option to match with stone. You can find Milliput in any plumbing, hardware, or craft store.
From each of the two Milliput sticks, take equal quantities and knead and roll them into your hand for about five minutes. Eventually, the colors will blend. If needed, you can wear gloves during this process to protect your hands from any chemicals.
4. Fill Any Gaps
Using your freshly made Milliput putty and your knife or narrow spatula, you can begin filling in any gaps. This technique works especially well with any cracks your statue might have endured.
The Milliput putty is soft but will begin to harden after around three to four hours. If you need to work quickly, you can use a hairdryer to set the putty in just a few minutes. You'll want to make sure you clean any tools you use with the putty immediately after to avoid any hardening.
5. Make Missing Parts
Not only is the Milliput putty an excellent tool for filling cracks in your statue, but it can also help you create any missing or severely damaged parts. Statues' delicate toes or fingers can be damaged easily--but can be rebuilt with the help of Milliput putty.
If you need to pause your work for whatever reason, you can keep your Milliput putty in your freezer for up to 36 hours. Once you are ready to return to your putty, put it into your hands to warm and soften it once again.
6. Address Hairline Cracks
Although small hairline cracks might seem insignificant, it is crucial to repair these to avoid any moisture being drawn into your precious statue. Once water can enter through the crack, it can freeze, expand, and cause larger cracks or even more severe damages.
You can use an epoxy adhesive for hairline cracks to seal them up, using equal amounts of the two-part resin kit. Use gloves for the epoxy adhesive and rub it into any hairline cracks on your statue. Carefully wipe away any excess with a damp cloth to avoid any bulky buildup once you are done.
7. Paint
Once all of your epoxy putty and adhesive have dried down, you can begin the painting portion as needed. Look for any multi-purpose acrylic paint at your local craft store and find the shade that matches best with your statue. It's not uncommon to have to blend a few colors to get the exact shade needed.
You can even take this time to paint your entire statue, so you don't have to worry about matching colors. If you plan to paint your entire statue a lighter color, it's recommended to try adding a touch of a light gray into the crevices. This artistic touch gives a more realistic stone appearance that looks completely natural.
Typically, you can expect your paint to dry in around 20 to 24 hours. Once all of the paint on your statue has completely dried, you'll use your acrylic sealer spray to seal it. If you plan to put your statue outdoors, this sealant spray is crucial to help protect it from any elements. This added layer of protection helps preserve the paint job you've just completed for many years.
8. Restore That Antique Touch
If you have just repaired a portion of your statue and want to make sure it blends in with the rest of it, you can help to encourage the growth of lichen and moss. There are countless techniques to pull off this antiquing process, including rubbing your statue with manure, compost, or milk. (Yes, really.) One of the most reliable options is to coat the area with plain natural yogurt lightly. (Nope, not that strawberry-banana one nobody wants.)
You can also opt to antique your statue after you have painted it to give it the ultimate natural appearance in your garden. The aesthetic choices are entirely up to you!
9. Enjoy
Last but not least, once you've finished all of the last aesthetic touches of your liking, it's time to sit back and enjoy your final product. It can be incredibly satisfying to restore a garden statue fully. Always remember to take before and after pictures so you can truly appreciate how far your statue has come from its original condition.
Comment


